Plastering is one of the oldest building materials known to man. It’s been used for thousands of years, from ancient Rome to present-day Egypt. Plaster is still a popular option for many homeowners, but it can be tricky to work with if you don’t know what you’re doing, which is why many people choose to hire a local contractor to do the job for them. Here are some tips on how to repair plaster so that your home looks even more beautiful than before! Plaster Repair in Inver Grove Heights MN
What is Plaster?
Plaster is a mixture of lime, sand, and water. It’s a very brittle material that can be damaged by moisture, so it needs to be sealed with paint. The best way to repair plaster is by filling the hole with plaster. Then you can patch the crack or holes in your wall with paper tape or cloth tape and apply a coat of paint over dried plaster. When applying primer before painting make sure you only use one coat as multiple layers may cause cracking in the future.
Chip Away Loose Plaster
To start the plaster repair process, chip away any loose plaster with your putty knife. If any parts of the wall haven’t been damaged, but still have plaster on them, chip off as much of it as possible. If you can use a hammer and chisel to remove any hardened areas that are too hard to chip away with your putty knife, go for it!
Use a damp cloth to clean off the area after removing all loose material from the wall.
Use a paint scraper to scrape off old paint from around the damaged spots if they have been painted over many times; this will help prepare them for new coats of paint or plastering materials when you are ready to begin repairs.
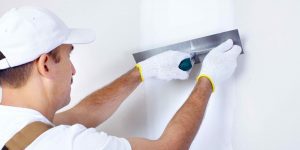
Use a small trowel (or even just your fingers) to smooth out everything so there aren’t any bumps or dips in the surface of the wall where new plaster can create cracks later on down the road – these small bumps can lead to larger problems like cracking which would require more extensive work later on down the road…and money spent! If you’re not sure how to go about this process, reach out to your local contractor for help!
Fill the Hole With Plaster
Once the plaster has dried, you’ll want to smooth it out with a wet sponge. You can also use an old sock or rag, but the sponge will give you a smoother finish. You don’t want to use too much water or else the patch won’t hold well; it’s better to err on the side of caution and use less than is needed rather than try and force more into the hole.
Once you’ve smoothed out your patch, let it dry completely before painting over it (or adding another layer of plaster). The repair will last longer if you wait several days before painting over it again—but if this isn’t possible because of time constraints or money, then by all means go ahead!
Smooth the Patch with a Damp Sponge
The last step is to smooth the patch with a damp sponge. Use a dry sponge and you’ll leave behind visible streaks that take extra time to smooth out. Let the plaster dry completely before painting any other areas of your wall or ceiling, which should be done while it’s still tacky so the paint will adhere properly.
Apply a Coat of Paint
Apply a coat of paint when the patched area is completely dry. Use a brush or roller on your plaster wall to apply paint. You may need to apply several coats; let each one dry before applying another coat. It’s best if you use high-quality paint for this project, such as satin or semi-gloss. This will make your walls look more professional and give them a smooth finish that’s easy to clean up after you’re done painting. You can also hire a professional painting company to help with the job.
Creating a Backing for Larger Holes
For larger holes or cracks, create a backing using chicken wire or strips of wood.
Using a putty knife, apply the plaster to the hole/crack in two steps: first press it into place, then smooth it over with a damp sponge. Let dry completely before painting (about 24 hours).
If there are still gaps between your patch and wall surface, sand down the edges until they are flush. Then use caulk to fill in any small cracks or voids around the edges of your patch. Finally, apply mesh tape over large holes so that paint doesn’t seep under during touchups later on.
Let the Plaster Dry Completely
As you know, there are many ways to repair plaster. You must wait until it’s completely dry before painting over it. If you don’t, the paint will peel off easily. If you wait too long after repairing the plaster, it won’t stick to the wall and will fall off in pieces when you try to paint on top of it.
Some other things can go wrong with this method as well: if there is any damage to your walls from water or mold, those areas may need extra attention before they’re ready for painting; this could save both time and money down the line!
Plaster Repair in Inver Grove Heights MN
In conclusion, it’s clear that repairing plaster is a difficult process, but it can be done. Or, you can hire a professional contractor to do the job for you! If you want to know more about the repair process and what materials are available for your needs, contact us at Home Drywall and Painting in Inver Grove Heights, Minnesota today!