Drywall taping is one of the most important steps in achieving smooth, seamless walls. Even if drywall is installed perfectly, poor taping will always leave visible joints, cracks, or uneven surfaces.
In this drywall taping guide, you’ll learn exactly how to tape drywall, what materials to use, and how professionals create flawless finishes that disappear after painting.
What is Drywall Taping?
Without proper taping, joints will eventually crack or become visible through paint.
Tools and Materials You Need
Before starting, gather the following:
- Drywall joint tape (paper or mesh)
- Joint compound (mud)
- Drywall knife (6–12 inch recommended)
- Mud pan
- Sandpaper (120–220 grit)
- Corner trowel (optional for corners)
Types of Drywall Joint Tape
Understanding the right tape is important for a professional finish.
1. Paper Tape (Recommended)
✔ Stronger bond
✔ Professional finish
✔ Best for corners and seams
2. Mesh Tape
✔ Easier for beginners
✔ Self-adhesive
✔ Slightly weaker than paper tape
👉 Most professionals prefer paper Drywall taping for durability.
Step-by-Step Drywall Taping Guide
Step 1: Prepare the Surface
Before applying tape:
- Make sure seams are clean
- Remove dust and loose debris
- Ensure drywall screws are properly set below surface
A clean surface ensures better adhesion.
Step 2: Apply First Layer of Joint Compound
- Use a 6-inch knife
- Spread a thin layer of mud over the seam
- Cover about 2–3 inches on both sides
This layer acts as a base for the tape.
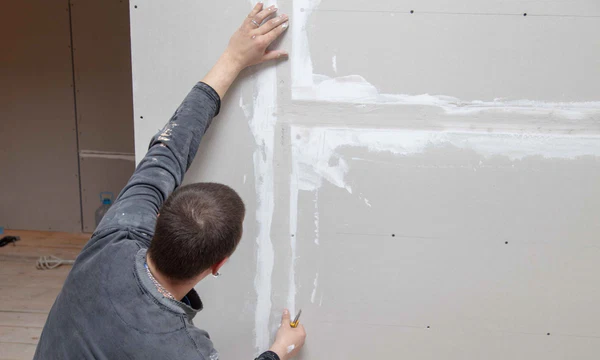
Step 3: Apply Drywall Joint Tape
- Press tape directly into wet compound
- Center it along the seam
- Smooth it out with your knife
Make sure there are no bubbles or wrinkles.
✔ This is the most critical step in how to tape drywall
Step 4: Embed the Tape
- Press the tape firmly into the compound
- Remove excess mud underneath
- Ensure full contact with the wall
This step locks the tape into place.
Step 5: Apply Second Coat (Cover Coat)
After the first layer dries:
- Use a wider knife (10–12 inch)
- Apply compound over the tape
- Feather edges outward
This starts blending the seam into the wall.
Step 6: Apply Final Coat
- Apply a thin finishing layer
- Extend slightly wider than previous coat
- Smooth as much as possible
This step is key for a seamless look.
Step 7: Sand the Surface
Once fully dry:
- Use fine grit sandpaper (120–220)
- Smooth edges carefully
- Avoid over-sanding tape
The goal is a perfectly flat wall.
Common Drywall Taping Mistakes
Avoid these errors:
❌ Using too much joint compound
❌ Not embedding tape properly
❌ Leaving air bubbles under tape
❌ Sanding too aggressively
❌ Skipping multiple coats
These mistakes often lead to visible seams or cracking later.
Pro Tips for Smooth Seamless Walls
✔ Use thin layers instead of thick coats
✔ Always feather edges outward
✔ Let each coat dry completely
✔ Use wider knives for finishing coats
✔ Keep lighting angled to check imperfections
Why Drywall Taping is So Important
Proper taping is what makes walls look like one solid surface instead of separate panels.
It helps:
- Prevent cracks
- Strengthen joints
- Improve paint finish
- Increase wall durability
Poor taping is the #1 reason walls look uneven after painting.
When to Call a Professional
You may want expert help if:
- Large areas need taping
- Ceiling joints are involved
- Texture matching is required
- You want a Level 5 smooth finish
- Previous DIY taping failed
Professionals ensure perfectly smooth, invisible seams.
Final Thoughts
Mastering how to tape drywall is essential for achieving smooth, professional-looking walls. At Home Drywall and Painting, we understand that with the right technique and patience, drywall seams can become completely invisible after painting.
Using proper drywall joint tape, thin compound layers, and careful sanding will ensure long-lasting, crack-free walls that look professionally finished.
Read More: Complete Guide to Drywall Repair