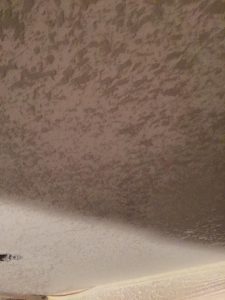
 After years upon years of staring up at this weird popcorn textured feature on your ceilings, you’ve finally decided that it’s time for a change. A lot of homeowners tend to think that they will be able to scrape their ceilings and paint themselves. Although the task may seem easy, a lot of mistakes can occur, which can damage your ceiling leading to costly repairs. At Home Drywall and Painting, we know that you not only want to get rid of that ugly popcorn stuff, but that you want to end up with a breathtaking ceiling when you finish. Our team of experts will walk with you every step of the way through your popcorn texture removal MN, so your ceilings will be better than ever before.
Popcorn Texture Removal MN: What is the Popcorn Ceiling Removal Process?
There are typically five steps to the popcorn removing and re-texturing process. Each home is different, so these steps can vary:
Step 1: Preparation
The first thing that needs to be done is to remove everything off the walls and ceilings. Everything–from pictures to ceiling fans, to tracking lighting and vent covers, everything needs to come down. Plants, animals, and children should be removed from the area as well.
To keep furniture safe, plastic sheeting is placed over them. Plastic sheeting will also be placed right at the ceiling line and draped to the floor. It is important to cover up any carpets as well. If any popcorn texture gets onto the floor, it can take hours upon hours to get that stuff out.
Step 2: Removal
The next step is the removal process. We begin by spraying your ceiling. The ceiling needs to be wet in order to scrape off the popcorn texture. We make sure to use just the right amount of pressure that can remove the texture, but keep your ceiling gouge-free. The amount of time it takes to complete the removal process will vary from room to room.
Step 3: Repair
With all of the popcorn texture off of the wall, now it’s time to analyze your ceiling to evaluate if there are any cracks or badly taped regions that need to be fixed. We check to see if any water leaks and sheetrock bows between joints need to be repaired.
Step 4: Re-texture
One of the most popular textures is skip trowel. We use the right tools to smooth out and feather any edges to make a smooth transition to your walls. We make sure to put a quality primer sealer on before moving forward. Sealer is an extremely important step because it can block stains, odors, and mildew from leaking through your new texture. A primer can also give you a good base for your top coat.
Step 5: Clean-up
Just as important as the set-up is the clean-up. We safely remove all the plastic and tape from the ceilings and furniture. We slowly roll up the plastic so we do not leave any popcorn texture on your floor.
Are you ready for a popcorn texture removal MN from your ceilings? Call our office today at (612) 816-5333, we can help! At Home Drywall & Painting, we are the most trusted drywall ceiling contractors in Minnesota. Check out our reviews on BBB !
